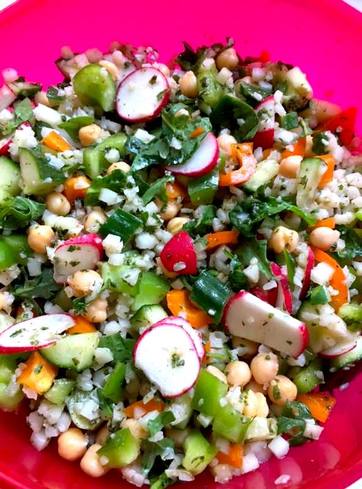
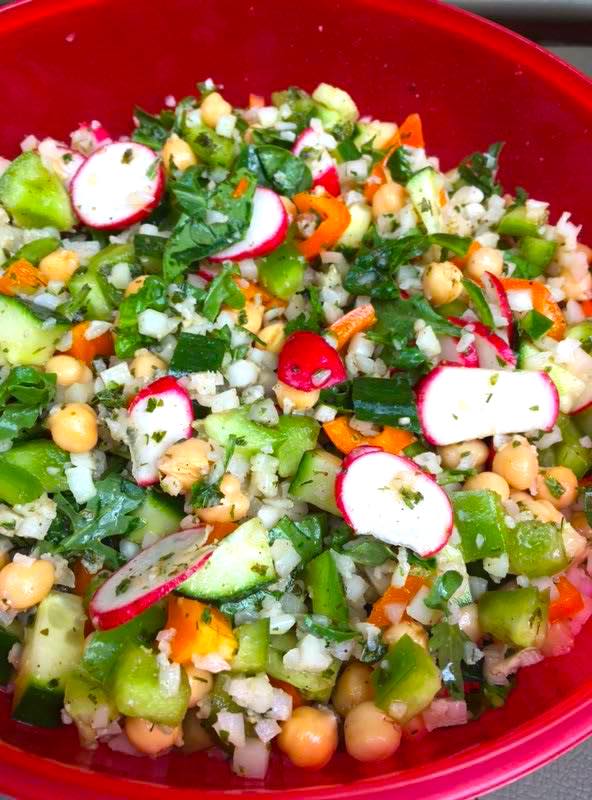
 I'm letting this delicious salad marinate for later this afternoon - can’t wait! I made this salad over the long weekend, and I'm already ready to eat it again. I tucked into this dish after spending an afternoon splashing around in the sun at the river. We usually bring a few snacks with us to the water, but inevitably, we all turn up back at the house several hours later, absolutely famished. This salad was the perfect combination of carbs, proteins, and refreshing greens. It filled me up without weighing me down! There a million different ways to make an incredible salad, but this one ranks at the top of my list. I think it's that amazing combination of vegetables and tangy, sweet spices. There are a few staples to this salad that make it exceptionally good, and I'll be sharing those, but there's also a truly fantastic "secret ingredient" that I want to share with you all, because I don't think too may people know about it!
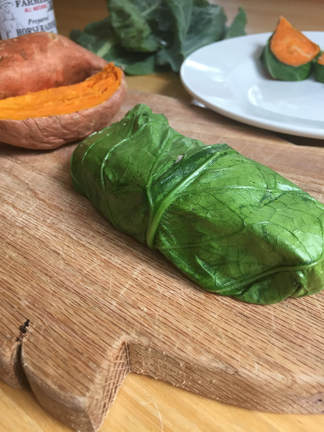
 Last week the whole family went out to the lake for a long swim. The water has been beautiful and smooth, and it was so much fun to spend the day training, playing, and soaking up the sunshine. When we got back to the house around 3 p.m., we were starving. We had plans for dinner, so we needed something delicious and healthy that would get us through the afternoon without ruining appetites. This recipe was the perfect fix! There are just 4 ingredients, and it's simple, fast, and energy packed without being high calorie. Plus, it's so tasty! We have a variety of palates in our family, and everyone was satisfied by these flavor-packed little rolls. 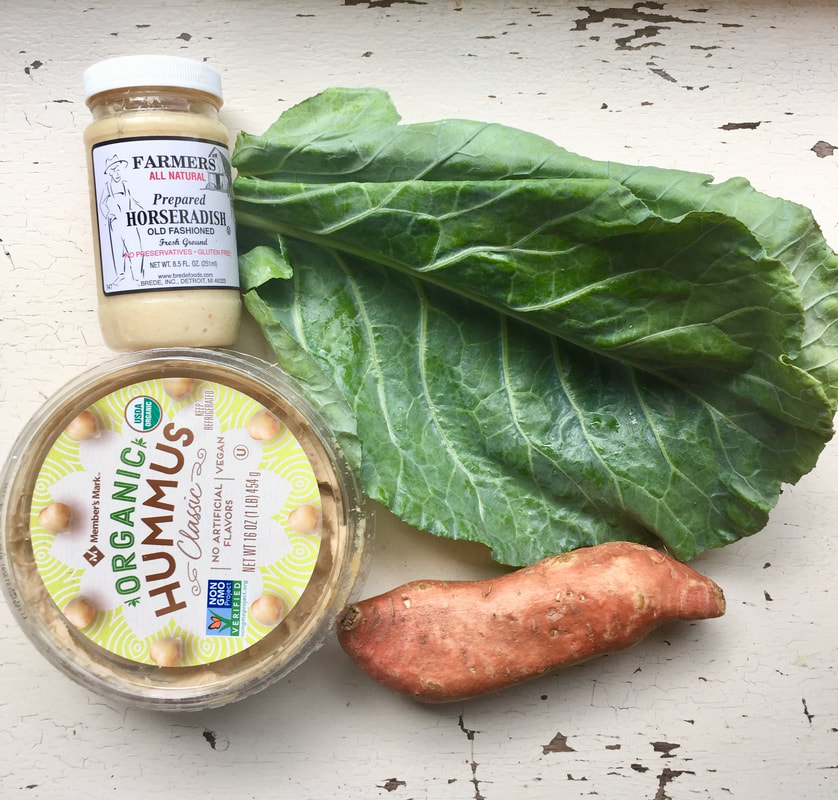 Ingredients
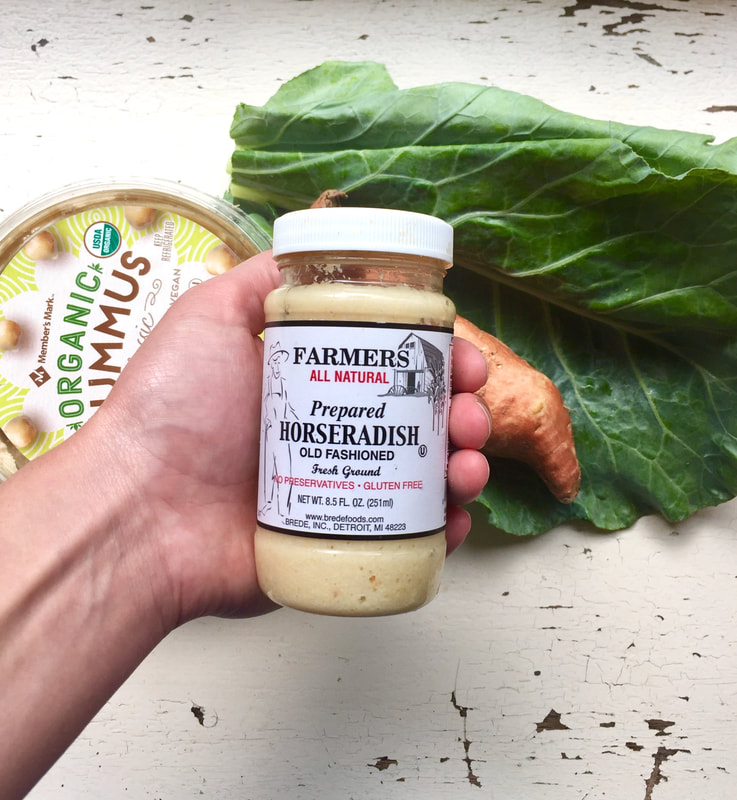 I love this brand of horseradish. It's fresh ground, free of preservatives and gluten. I also find that this one has the perfect amount of spice/flavor for my family. So, if you're looking for a recommendation, try this brand! But otherwise, whatever you can find in the fridge will do just fine. 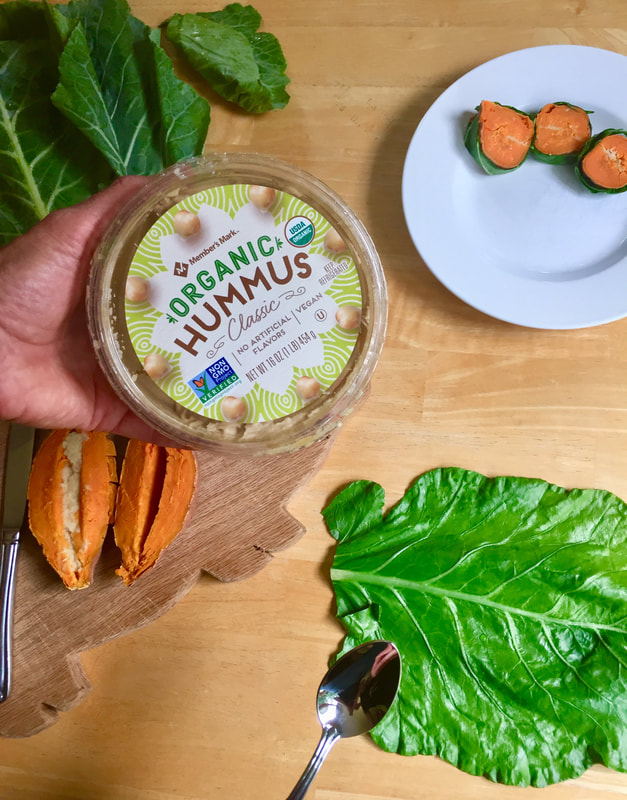 Directions
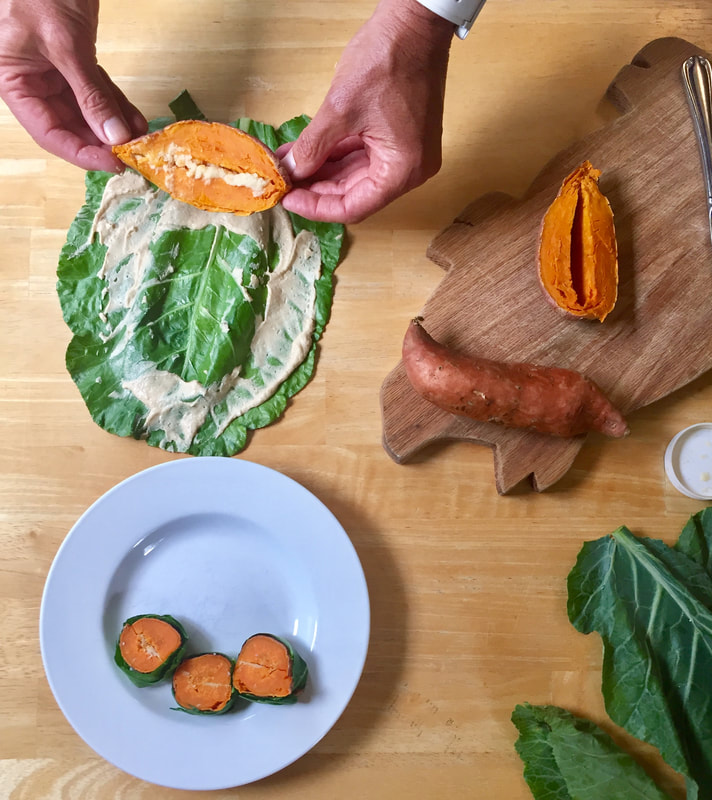
 These were such a hit, we'll definitely be making them again! They're a little bit like vegetarian sushi, and they're a whole lot of delicious. Do you have your own healthy snack recipes? Let me know some of your time honored favorites - from one kitchen to another! 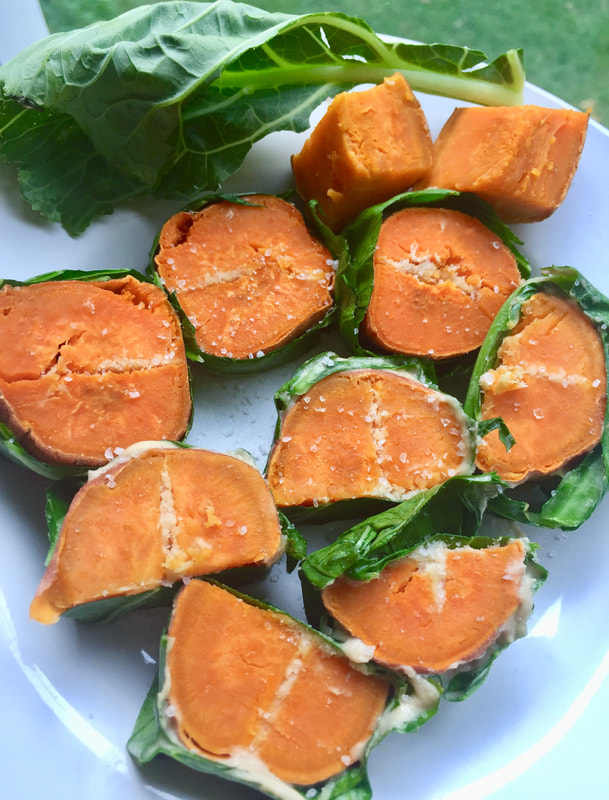 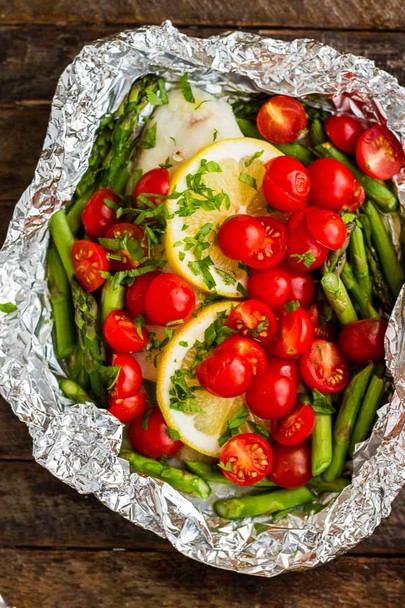 I've been trying to work more fish into our family meals lately. Summer time is the perfect excuse to fire up the grill, and while my 16 year old is totally gung-ho about the idea of eating steak every night, Greg and I have fun dreaming up the creative recipes that offer us some healthier options. Grilled Tilapia with seasonal veggies is one of our absolute favorites. It's mouthwateringly good, especially when we get to throw in the fresh produce that we picked up at the farmer's market over the weekend. It's also fast and totally fuss-free! Now there's been some buzz about Tilapia lately, so here are a few good things to know. Tilapia is low in calories, mildly flavored, inexpensive, and high in protein. It does not contain as many healthy fatty acids as some other fish (like Salmon, for example), but that's just fine as long as you're not only eating Tilapia to get those nutrients. It may also be worth it to look into where your fish is coming from. As with most other kinds of fish, there has been some concern in recent years over farming practices. If you're worried, you might try to find some Tilapia that isn't sourced from China. Other places, like Canada, have a little bit more regulation. Overall, Tilapia is a wonderful fish to include as part of a healthy and varied diet! Serves 4
Total Time: 35 Minutes INGREDIENTS
PROCEDURE
NUTRITION 180 calories; 7 g fat (1 g sat); 2 g fiber; 7 g carbohydrates; 24 g protein; 52 mcg folate; 57 mg cholesterol; 3 g sugars; 0 g added sugars; 511 IU vitamin A; 17 mg vitamin C; 45 mg calcium; 1 mg iron; 423 mg sodium; 591 mg potassium 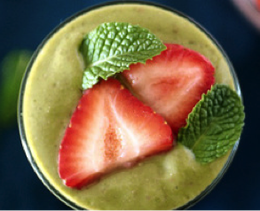 INGREDIENTS
**if you are a chocolate mint lover, try chocolate protein powder instead. Use a dash of stevia or honey if your protein isn't already sweetened. PREPARATION Blend all of the ingredients together thoroughly. It can be stored in the fridge overnight, though stir before drinking the next day! TIP For a truly creamy texture, try adding 1/2 cup plain greek yogurt and reducing the protein powder by half. 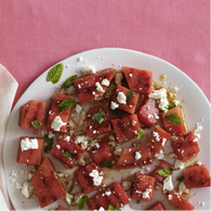 INGREDIENTS
PREPARATION
NUTRITIONAL INFORMATION Calories: 122, Total Fat: 4.7g, Protein: 3g, Carbohydrates: 19g, Fiber: 1.5g, Cholesterol: 8mg, Iron: 2mg, Sodium: 208mg, Calcium: 79mg 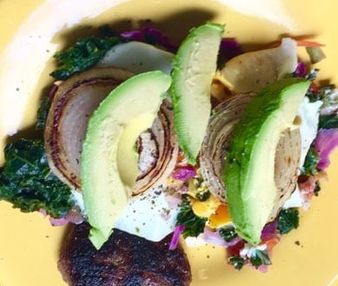
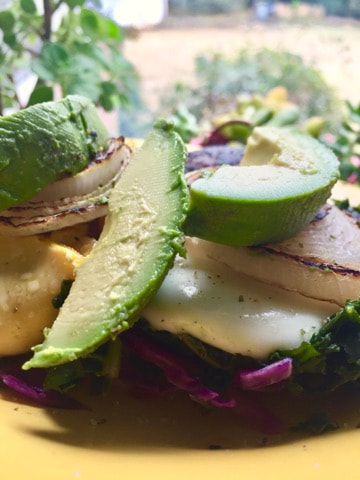
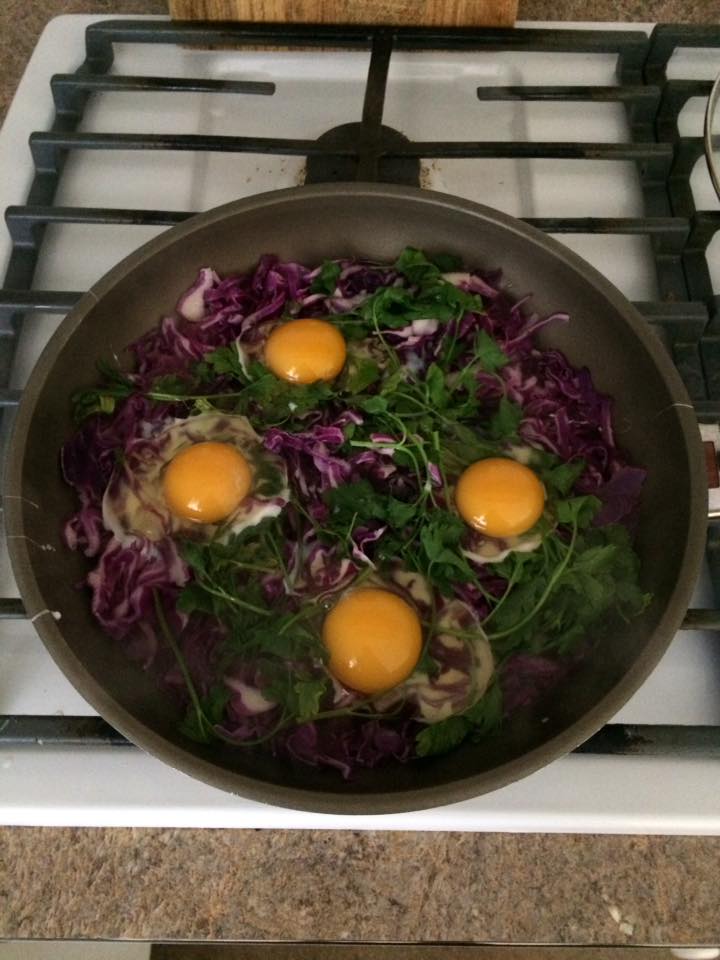
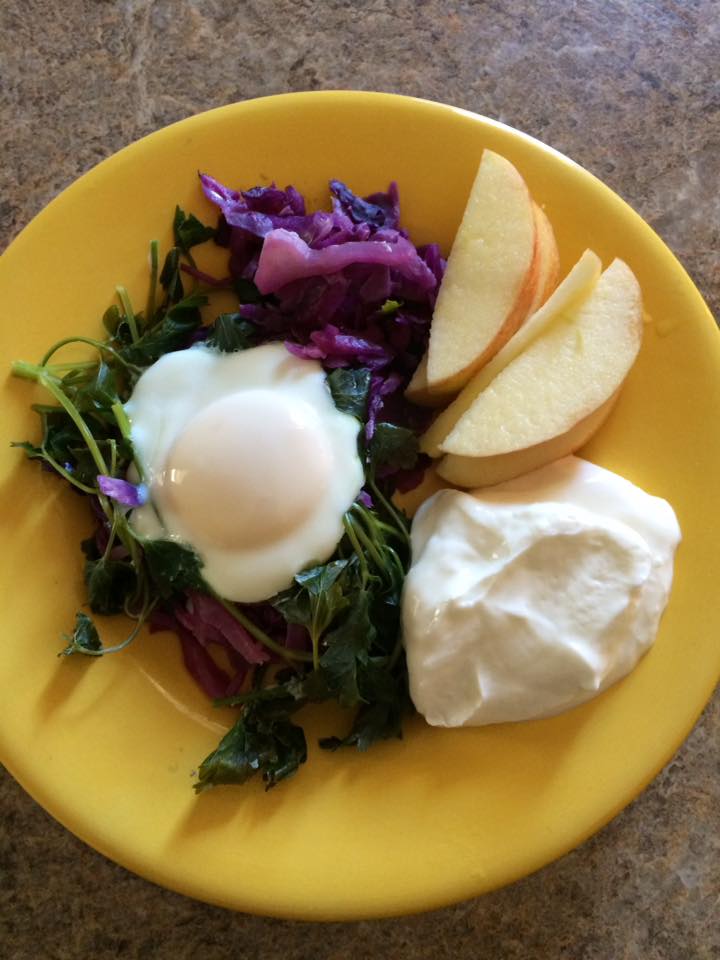
Every once in a while, I like to invite the whole crew over for brunch. It's a fun weekend tradition that brings my family together, including my older children and some of my nieces and nephews. As you can imagine, we get quite a few different eaters in the room! So when I'm looking for a recipe that's simple, quick, and sure to satisfy even the pickiest of our crew, this is what I usually turn to! The cook time is so short that I usually start the meal as everyone crowds into the kitchen for coffee, and it's usually done by the time everyone finishes that leisurely first cup. This dish is also perfect because it's so healthy and easy to customize. I can add or leave out parts of the meal without having to change the recipe for everyone else! This weekend I threw this dish together to serve 8 happy eaters, and we were all so satisfied! The recipe below serves 4, but you can double it or tweak it easily. If you've got a hungry teenage boy (I do!) then you might add an extra egg or cook up another portion size. This breakfast is guaranteed to be fast, packed with good nutrition, and terribly delicious.
INGREDIENTS
10 oz bag of shredded red cabbage (approx. 3 cups packed full) 1 C. chopped Kale 1 sliced Avocado 1 sliced Onion Large non-stick skillet with snug fitting lid 2 T. Water 2-4 Tbsp Balsalmic Vinegar 4 Large or Medium fresh eggs (the older an egg gets the more likely the white will be watery and the yolk will break) 1 tsp Black Pepper (season to taste) 1 tsp Sea Salt (season to taste) 1 package Extra-Lean Ground Sausage (can be turkey!) DIRECTIONS

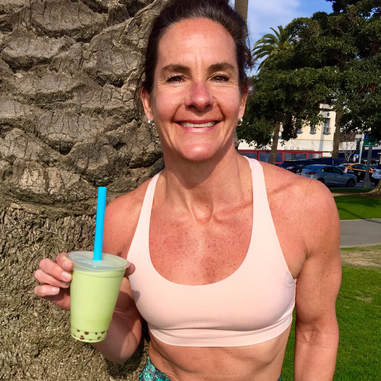
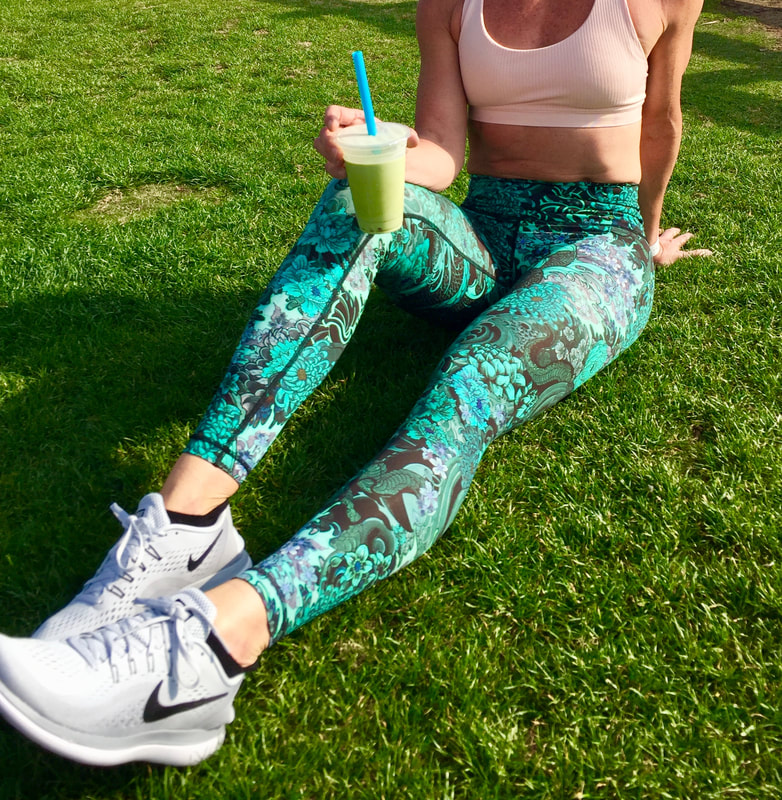
You've probably heard of Matcha by now, and if you haven't, welcome to the in-crowd - It's hip, it's trendy! Matcha is the powdered green tea that's taken the world by storm, and for good reason. When I'm in need of an afternoon pick-me-up, it's not coffee I turn to. Don't get me wrong, I love a good cup of coffee - alway will! - but here are the 4 reasons Matcha just might be better than your average cup of joe.
3. Matcha boosts memory and concentration: Matcha powder contains the amino acid L-Theanine, which has been shown to increase the production of dopamine and serotonin. These two chemicals serve to enhance mood, improve memory, and promote better concentration – something I'm always in search of during my workday!
4. Matcha has more antioxidants: Matcha is ridiculously full of catechins, flavonoids, and polyphenols, especially the mighty epigallocatechin gallate (EGCG), which has been linked to so many health benefits and has therapeutic applications to the treatment of so many disorders, including cancer.
I think one of the best parts of this green wonder is how easy it is to find! Maybe you haven't tried Matcha yet, but your opportunity is just around the corner! Seriously, you can order this drink at any Starbucks, or you can find the powder at almost any natural foods retailer or Walmart. If you decide to order your first drink, just be sure to watch out for all the heavy add-ins. This tea is so good it doesn't need cream or tons of added sugar.

CASSAVA TORTILLAS
Recipe for 16 tortillas (approx. 4” in diameter) 1.5 Cups Natural Cassava Flour (Anthony’s Premium or Otto’s preferred) ½ tsp Fine Sea Salt Mix together in a medium size bowl, using a fork. Add 4 Tbsp. of Olive Oil to the bowl, and mix lightly with the fork Measure 2/3 C. Warm Water, add gradually to the flour/oil mixture. Turning the bowl while gently mixing in with the fork. The dough should begin to stick together, and all of the dry flour mixture should be easily combining into the dough. If the dough is dry and crumbly, add up to 1/3 C. more of warm water, adding a little at a time. When dough begins to clump together, remove the fork, and finish mixing with your hands. Make sure the dry flour gets mixed in well to the dough. Form a Ball and let rest in the bowl. Lightly coat the inside of large cast iron skillet or griddle with olive oil, wiping out excess with a paper towel. Heat the skillet or griddle to medium heat level, just before the oil would begin to smoke. If it gets to smoking, turn the temperature down just a bit. When the skillet is hot, form a ball of dough about the size of a golf ball, flatten slightly between your palms. Place between two 8” pieces of parchment paper. Roll out to a 4 inch circle, rotating the paper so that you always roll from the center out to the edge. Strive for fairly even thickness throughout the tortilla. Place the flattened circle in the hot skillet, and move on to making another tortilla. Usually the first is ready to flip when you have the second one done, (~1.5-2 minutes) if the skillet is hot enough. The underside should get lightly browned in spots, and the top will look a little puffy when it is ready to flip. Nutrition: 1/16 of recipe = 1 tortilla = approx. 70 calories total, with 30 calories of fat (3.4 gm) and 40 calories of carbohydrate (10 gm). Each tortilla is approx. 1 gm of fiber and 5% of your iron rda. 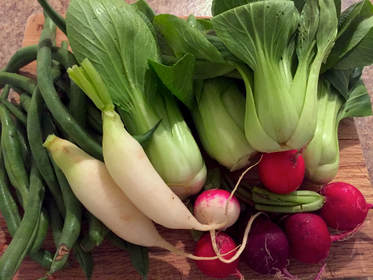 There's still time over the next few weeks to make a visit to your local Farmer's Market. I've been kicking off the fall season with a bounty of fresh vegetables! Last week I returned home with my little re-usable tote bag stocked with baby bok choy, green beans, and red and white radishes. I had an incredible time turning these fall veggie staples into a delicious dinner for me and my family. Of course, step one was laying these beauties out on the cutting board... 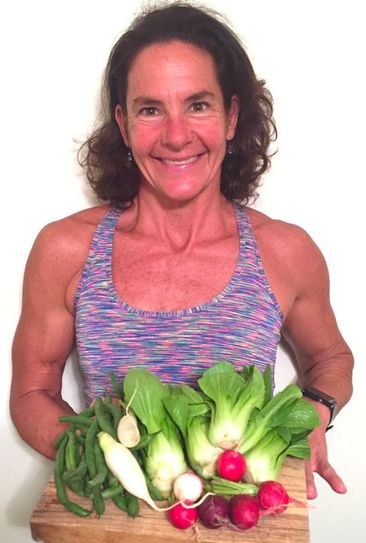 Step two was diving into the actual prep. As a kid, I used to spend time in the kitchen with my mom, helping her prepare dinner for my dad and my six siblings. We grew green beans in our garden each year, and they were a staple of many of my mother's dishes. I have a lot of memories of snapping beans while she handled the more major tasks. So, while we have a slightly smaller crowd to cook for, I asked my youngest son to help me out by snapping the ends off of the green beans and slicing up a few of the radishes. Making our dinners a family affair makes the prep go quicker and turns a necessary activity into a chance for us to spend time together. Plus, the kids get to learn valuable skills along the way! Deciding what to cook was a cinch, because I knew I wanted to incorporate all the veggies we'd picked up, and to have a little protein and fresh fruit in there to boot! 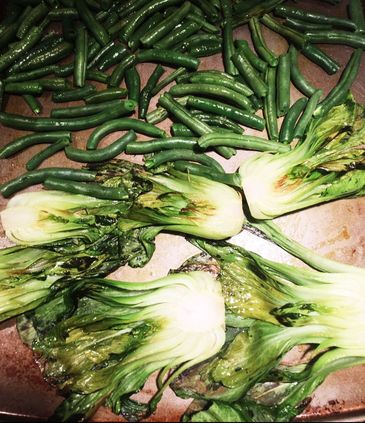 After we had everything chopped and ready to go, we got to work. For me, fall is the season of skillet cooking! I started off by taking my baby bok choy and placing them in a hot skillet sprayed with sesame seed oil. The sesame seed oil gives veggies a rich, nutty flavor, without adding a lot of sodium or extra calories. I quickly pan seared my bok choy, and then placed them, along with the green beans I'd just finished steaming, together on a baking sheet. I put the oven at 375 degrees and roasted both vegetables until they were crispy and tender. The final piece of the puzzle was my fresh fruit! To add some extra sweetness and tang to this dish, I grabbed a bag of frozen mango. 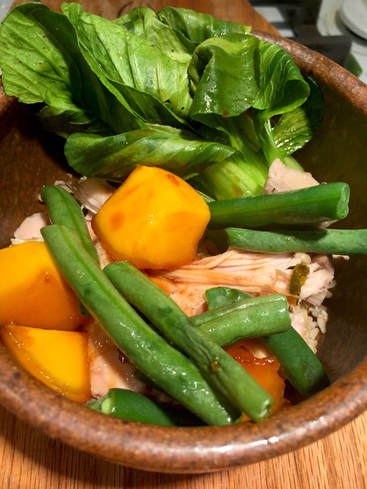 Frozen mango is like a cook's secret weapon. It's delicious on any dish, and catapults your meal to the next level. To complete this dish, I pan cooked the mango, sautéing the frozen cubes with a little bit of balsamic vinegar. This trick brings out the flavor of the mango, and creates a delicious sauce that you can drizzle over the rest of the meal for an added zing. When this step was done, I put everything together in a bowl with some baked chicken. It was easy, fun, and absolutely delicious. Because my family is crazy for radishes, we sliced those up and munched on them raw with our meal. But, if you're a little less eccentric, those can be cooked right alongside everything else. The whole cooking process, from tote-bag to dinner table, took about half an hour. I hope you'll all take advantage of this seasonal chance to spice up your cooking, and add a whole bunch of fresh, locally grown vegetables. Nothing beats cooking healthy with the people you care about. Happy Fall! When I'm grilling vegetables, I like to keep it simple. You'll see a lot of recipes out there that favor heavy spices or lots of oil, but by the time you've applied all that, you've almost completely lost the flavor of the original produce. To add a little zing to my meal, I add a splash of balsamic vinaigrette, and a bit of salt and pepper sprinkled over the top. Sometimes less really is more. Here are a few extra tips to get you going in the grilled-veggie department.
1. Grilled Asparagus Look for fat spears to put on the grill—their meatiness works well with grilling and they're easier to manage on the grate (and less likely to fall through!). Grill until tender with grill marks, 8 to 10 minutes total. 2. Grilled Beets Yes, you can grill beets! The hot fire of the grill brings out the earthy sweetness of beets with an added hint of smoky flavor and an almost candied coating. Slice the beets. In general, creating more surface area will help speed along the grilling process. Leave over heat until tender. 3. Grilled Cabbage Cabbage is delicious grilled! The sweetness of the vegetable is drawn out, and the crispy, blackened edges give your meal a soft, crunchy texture. Cut the cabbage into wedges and either place them on skewers, or just directly on top of the grill. Cook for 10 to 15 min. What can't you grill, really? Some of my other favorites include tomatoes, eggplant, zucchini, green beans, spring onions, and certainly peppers! Any veggie you can imagine, it's probably delicious fresh off the grill. Just follow a few simple tips:
Otherwise, load up the grill with confidence, and when the veggies come off, just enjoy! 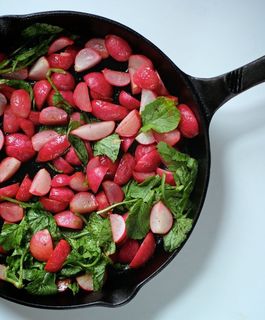 This delicious recipe includes one of our favorite, hydrating veggies. Not only do these pink-tinted beauties pack a zing, they fight free-radicals, reduce inflammation, and boost your immune system. You couldn't ask for much more from a dinner. Roast, eat, enjoy!
· 1 ½ pounds radishes, trimmed, scrubbed, and halved · 2 tablespoons extra virgin olive oil · 2 tablespoons red or white wine vinegar · 1-2 Tbsp Fresh Lime juice · 1 tablespoon snipped fresh chives · ½ teaspoon Dijon-style mustard · ¼ teaspoon ground black pepper · Pinch of sea salt Directions 1. Preheat oven to 425 degrees F. In a medium bowl toss radishes with 1 tablespoon of the olive oil. Place the radishes in a 15x10x1-inch baking pan or a pre-heated cast iron skillet. Roast, uncovered, for 30 to 35 minutes or until tender and lightly browned, stirring once. 2. For chive vinaigrette, in a screw-top jar combine the remaining 1 tablespoon olive oil, the wine vinegar, chives, mustard, pepper, and salt. Drizzle vinaigrette over radishes; toss to coat. 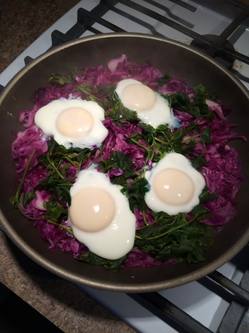 This easy, delicious recipe is done in a flash and serves four hungry breakfast eaters! INGREDIENTS 10 oz bag of shredded red cabbage (approx. 3 cups packed full) 1 C. chopped cilantro or parsley (optional) Large non-stick skillet with snug fitting lid 2 T. Water 2-4 Tbsp Basalmic Vinegar 4 Large or Medium fresh eggs (the older an egg gets the more likely the white will be watery and the yolk will break) DIRECTIONS Heat the water in the skillet over med-high heat, then add the bag of cabbage and greens if you are adding. Sprinkle the top of the cabbage with 2-4 Tbsp of flavored balsamic vinegar. I love white balsamic with pear or raspberry! Place the lid on and let steam 2-3 minutes while you get the eggs. Turn the heat down to low, remove the lid, and carefully crack and place 4 eggs on top of the cabbage. You are trying to keep them from spreading out too much, so keep the shell close to the surface and slide the egg out. Leave some space between the eggs, and the edge of the pan. Put the lid back on and let the eggs steam poach for 4- 8 minutes depending on how firm you like your egg yolks. The whites need to get fully cooked though before you turn the heat off. Remove from the heat, let the steam dissipate by taking the lid off. Serves 4 portions of cabbage and 1 egg each, or you can double up on the eggs and cabbage depending on your needs and hunger. Makes for a complete meal if you plate with some greek yogurt and fruit of choice. 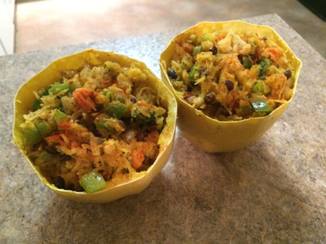 This spaghetti squash boat is delicious and saves the dishes! Give it a try the next time you're cooking a healthy dinner for two! Ingredients for 2-3 Servings · 1 small spaghetti squash (approx. 5-6” long) · 1 teaspoon olive oil · 1/2 medium yellow onion, diced (celery is a sub for the onions) · 1/2 medium red bell pepper, diced · 1 tablespoon minced garlic or mince a fresh pepper or ginger · 1/2 teaspoon Italian seasonings · 1 cup sliced mushrooms · 1 cup broccoli florets · 1 cup canned black beans, rinsed and drained · 1/4 cup grated parmesan cheese or sub in fresh cubed avocado · Salt and pepper to taste Directions Preheat oven to 375 degrees F. Cut spaghetti squash in half from top to bottom. Scoop out seeds and place flesh side down in large microwave safe bowl. Microwave for 7-8 minutes; allow to cool. Meanwhile, heat olive oil in cast iron skillet and sauté onions, peppers, garlic, and mushrooms together until softened. Season to taste with salt, pepper, and Italian seasonings. Stir in broccoli and cook for a few minutes to brighten green in color. Stir in black beans; remove from heat. Once spaghetti squash is cool enough to touch, carefully use a fork to scrape out spaghetti squash strands and transfer to a bowl. Toss spaghetti squash with cooked veggies and 1/4 cup cheddar cheese. Pour spaghetti squash mixture into spaghetti squash skins and top with remaining cheese. Bake in the oven at 375 degrees F for 8-10 minutes until cheese melts. Nutrition Information Serving Size: 1 boat Per serving: Calories: 370; Total Fat: 12g; Saturated Fat: 7g; Monounsaturated Fat: 2g; Cholesterol: 25mg; Sodium: 395mg; Carbohydrate: 52g; Dietary Fiber: 10g; Sugar: 4g; Protein: 19g Nutrition Bonus: Potassium: 994mg; Iron: 20%; Vitamin A: 16%; Vitamin C: 130%; Calcium: 33% The holiday season is here! I've been spending a lot of time in my kitchen lately, working with one of my favorite foods-cranberries! These delicious berries are packed with antioxidants and actively work to promote a healthy digestive system, immune system, and reduce inflammation. Check out a couple of my favorite holiday cranberry recipes below! Wishing you and all your loved ones a happy, healthy Thanksgiving. I'm so grateful for all the wonderful people in my life and the many exciting experiences we bring to each other each year. This is a wonderful time to appreciate our health, friends, abilities, the abundance and variety of good, clean food, and the privilege to make choices in our daily life. Now, more than ever, striving to be positive and inclusive can help you to feel healthy of body and spirit. Make the most of this fun season!  CRANBERRY ORANGE PUMPKIN MUFFINS Makes 12 muffins Preparation Time: 20 minutes Cook Time: 30-35 minutes INGREDIENTS: 2 large, very ripe bananas ½ cup orange juice plus zest of one orange 1 15-ounce can pumpkin (not pumpkin pie filling) ½ cup Date Paste 2 tablespoons ground flax seeds 1 tablespoon Pumpkin Pie Spice 1 tablespoon alcohol-free Vanilla extract 1 cup dried cranberries, unsweetened or fruit juice sweetened 3 cups gluten free oats ¼ cup finely chopped walnuts ½ teaspoon cinnamon When pumpkin is plentiful, I like to make pumpkin spice oatmeal in the morning. One day I was in a hurry and didn’t have time to eat it and I wondered how it would taste baked into a muffin. The result was pure pumpkin perfection! These little beauties are moist and delicious. Instructions: Preheat oven to 350ºF. In a food processor fitted with the “S” blade, process bananas and OJ until smooth. Add pumpkin, date paste, extract, zest, flax seeds and spice and continue processing until smooth and creamy. Transfer to a large bowl and stir in the oats and dried cranberries. Spoon an equal amount of batter into a muffin tin lined with cupcake liners or silicone baking cups. You need to fill each muffin liner with about ½ cup of batter as these do not rise. A retractable ice cream scoop works well. In a separate bowl, mix the nuts and cinnamon and sprinkle evenly into each of the 12 muffin liners. A cheese grater or nut grinder works well for grinding the nuts. Bake for 30-35 minutes. 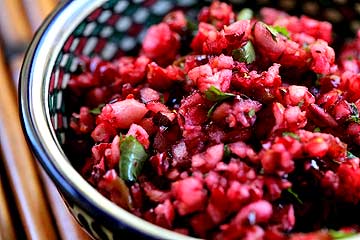 Mavie’s Fresh Cranberry Salsa
INGREDIENTS 1 bag fresh cranberries 1/4 C sugar or 1/8 C. sugar, 2 T. orange juice concentrate if you like orange 1/4 c minced green onions 1/2 c minced cilantro 2 medium jalapeños (or to desired heat) 2 Tbs lemon juice + lemon zest 2 Tbs grated fresh ginger (Freezing makes it easier to grate) or use minced jarred ginger Instructions Place cranberries in food processor with jalapeños (de-seeded & de-veined). Put mixture in bowl and add remaining ingredients. Chill for 4 hrs before serving. Serve over cream cheese if desired. I have also placed cranberries, japs, cilantro, and green onions in the food processor rather than mincing the latter two. Seems to work well! Enjoy these fun recipes and time with your friends and family. Happy Thanksgiving, from my kitchen to yours! 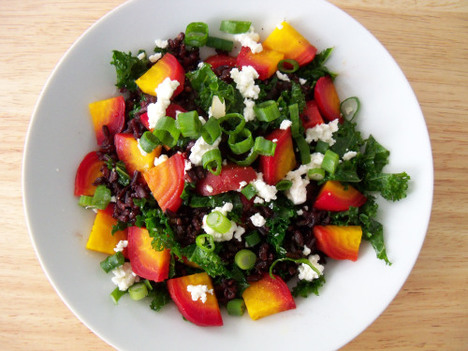 Beets are a unique source of phytonutrients. This super root packs antioxidants, anti-inflammatory properties, and detoxification support. Unlike many veggies, you can actually see all the good stuff. Beets get their gorgeous color from betalain, which can only be found in a few other foods, like the stems of chard or rhubarb. The concentration of betalains in the peel and flesh of beets make this veggie the best way to snag those health benefits!
Step 1: Prep These Ugly Bettys! Beets may not look enticing at first, but with a quick scrub and a bit of slicing, they're ready to liven up any plate. Step 2: Add Beets to Your Favorite Meal or Salad Try this fun recipe to get you started! INGREDIENTS
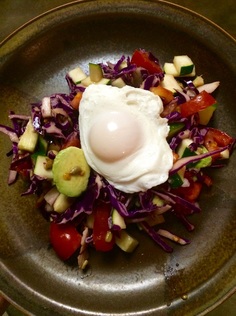 What I am loving lately: This is a chopped salad, marinated in fresh lime juice. It just gets better as it sits in the fridge. Start with a base of shredded red cabbage or broccoli slaw, buy it in the bag for quick and easy. Add any variety of chopped vegetables. I added zucchini, seedless cucumber, red onion, tomato, mixed color bell peppers, and a little chopped carrot. Toss with 2-4 Tbsp of lime juice, a dash of sea salt and black pepper. No oils needed. Eat it right away, and save the rest in a sealed container in the refrigerator. Serve out of it for any meal. I had some the next morning for breakfast, topped with a poached egg, and some avocado on the side. Delicious! Be creative with your veggies. Broccoli, cauliflower, chopped brussel sprouts, cilantro, celery, some spicy peppers, napa cabbage - they all work great! 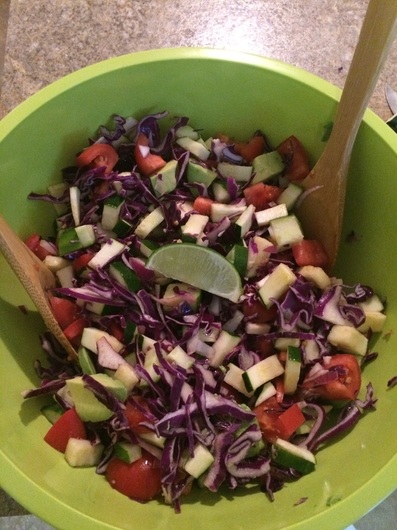 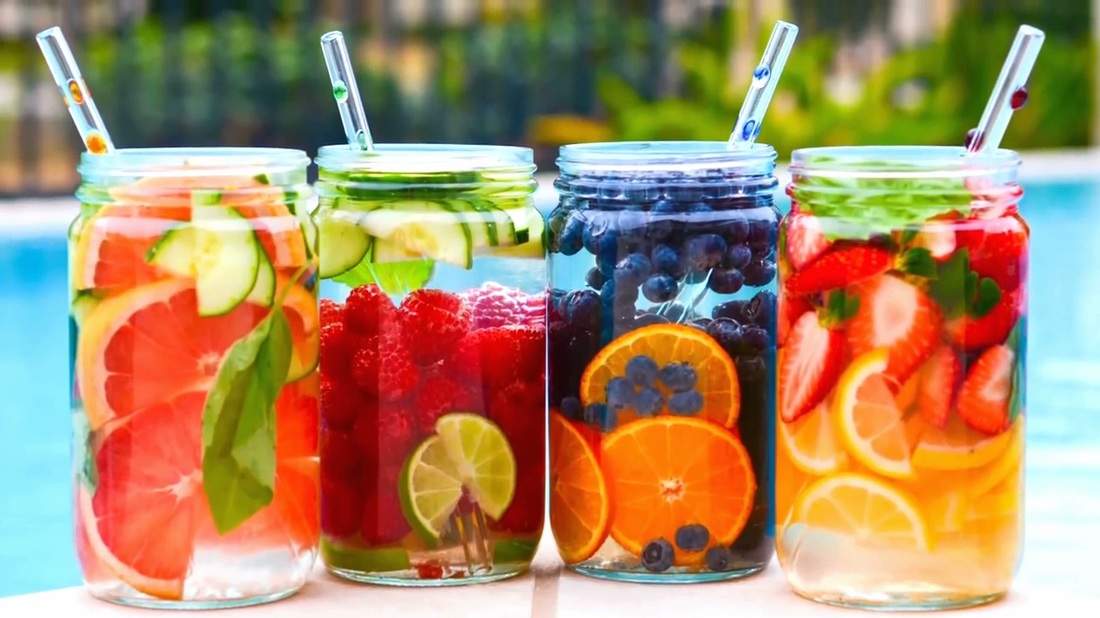 Hydration is without a doubt one of the biggest benefits of drinking fruit infused water. The majority of us are walking around dehydrated and simply don’t have a clue. Infusing your water with fruits, vegetables, herbs, any other ingredients you want will certainly encourage you to drink more water and to feel satisfied afterward. Here are some of the benefits of keeping your body hydrated:
Speaking of vitamin water, you’ve also likely seen those water flavoring packets on store shelves, as well. A lot of people use these as a quick addition to their water to make it taste better. Once again, these things contain coloring, sugar, and other additives that simply aren’t good for you. Soda, energy drinks, and sports drinks are another popular option among people on the go. These are even worse for you than the powdered additives and vitamin water. If you’re truly concerned about your health, you want to drink fruit infused water. All the ingredients are natural, and you get to control exactly what you’re putting into your body. You’ll be responsible for all of the ingredients, and the sky is the limit. Cucumber and mint is my favorite combination, but you can come up with a mix that's entirely your own. You will be able to add ingredients that give you all the vitamins and nutrients you want, without any of the harmful additives like food coloring, sugar, or aspartame. You’ll be able to drink water with a lovely fruity taste, but without all of those extra calories. 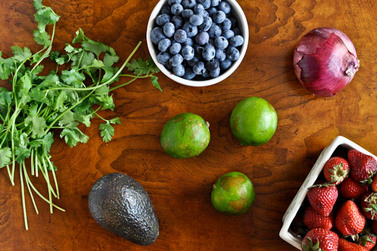 Makes about 1 1/2 cups
This easy to make, fresh and delicious salsa recipe is sure to be a hit at any gathering. Just toss these ingredients in a food processor and your dish is ready to eat. Feel free to make the recipe your own! Ingredients 1 cup fresh blueberries 5 medium strawberries 1/4 red onion 1 teaspoon lime zest juice of two limes 1/3 cup fresh cilantro leaves 1/2 avocado, chopped salt and pepper to taste Combine blueberries, strawberries, onion, lime zest, juice and cilantro in a food processor or blender and pulse. The consistency is up to you but I like to leave mine a bit chunky, so I only pulse it about 5-6 times. Taste and season with salt and pepper if desired. Scrape salsa into a bowl and fold in chopped avocado. Serve with pita or corn chips, or on top of fish or chicken. 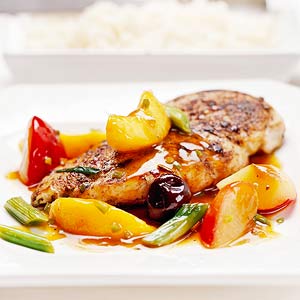 Also try this blueberry lime salsa recipe!
Yields: 4 servings. Prep Time 30 min Ingredients
Preparation
Nutrition Per serving: 233 kcal cal., 2 g fat 66 mg chol., 285 mg sodium, 27 g carb., 3 g fiber, 28 g pro. 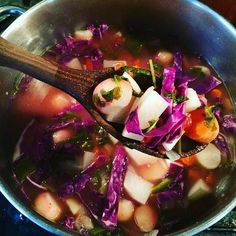 Ingredients:
· 1 medium onion (2 1/2 inches in diameter), chopped · 2 large stalks celery, chopped · 4 cloves garlic, pressed or 1 T. chopped jarred garlic · 1 Cup Shredded Purple or other cabbage · Small bag radishes, washed and trimmed (leave whole) · 1 cup chopped carrot (you can use baby carrots also) · 1 teaspoon black pepper · 1 teaspoon sea salt · ½ teaspoon fennel seeds (opt) · ½ tsp caraway seeds · 2 teaspoons turmeric · 1 can Diced Petite tomatoes (low sodium is best) juice included · 1 tablespoon fresh ginger, peeled and minced or 1 tsp powdered ginger · 1 diced mild jalapeno or other flavorful pepper · 1 lime or lemon – squeeze the juice into the soup, you can put the rind in for a bit too. Just be sure to remove after 15-20 minutes so it doesn’t impart too much bitterness. · 3 Cups Thinly Shredded Cabbage or Swiss Chard (I like the red cabbage best) · Up to 3 cups of any other veggies you have on hand (turnips, extra cabbage, broccoli, cilantro, arugula, chard, etc. Great place to use up those odds and ends!) · 6-8 cups low sodium stock or broth (I like vegetable or chicken Better Than Bouillon - but watch the saltiness) Preparation: EASY PREP: Throw everything in the slow cooker, stir, turn on Low and Cook 3-4 hours. STOVE TOP METHOD: 1. In a large soup pot, put oil, onion, and celery. Cook on low heat for 5 to 10 minutes to develop more sweetness in the onion. 2. Add garlic and turn up the heat to medium. Cook for a minute or so and add the peppers and carrots. Cook another minute or two and add the spices. Stir and cook until fragrant -- another minute or so. 3. Add tomatoes and stock, and simmer for 15 minutes. Add veggies and cabbage or chard and simmer for another 5-10 minutes or until the veggies are cooked to tender buy not mushy. 4. Adjust seasonings. Nutritional Analysis: Makes approximately 9 cups of soup, each with 6 grams of effective carbohydrate1plus 3 grams of fiber and 53-75 calories per cup NOTE: This soup is so forgiving and accepting. Get creative with the vegetables you have on hand. If you make your own broth, even better. Play around with herbs and spices you enjoy! 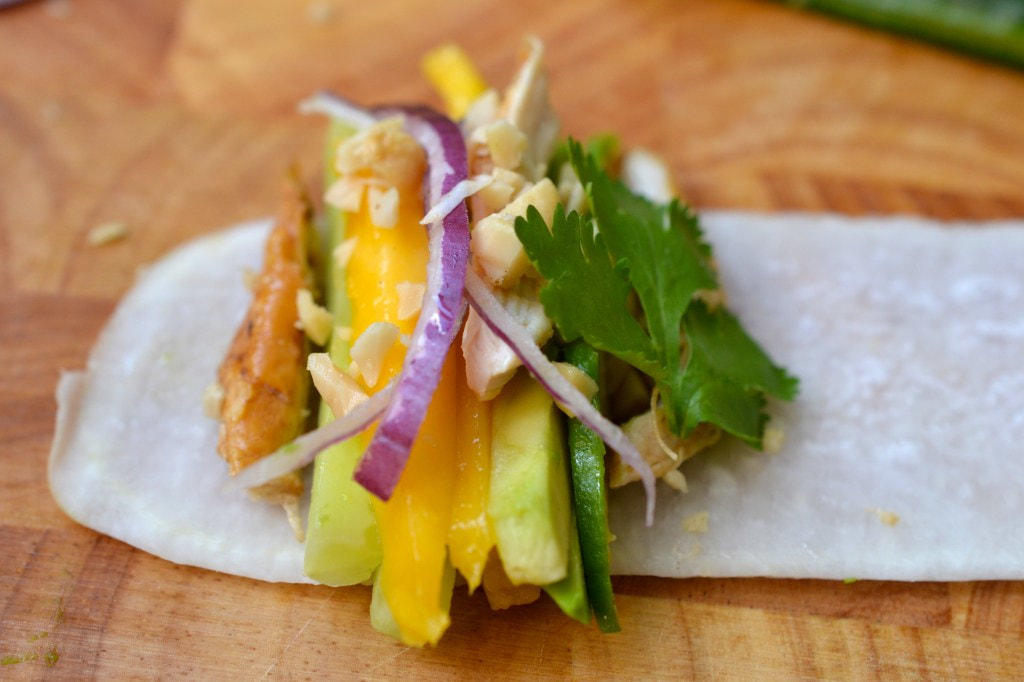 Hey everyone! I recently posted this recipe in my April Newsletter, but honestly, it's such a hit with my family that I decided that I would share it on here with all of you! If you want to see more delicious, healthy recipes along with other fun lifestyle content from me, you can subscribe to our free newsletter program! Click here to subscribe! Ingredients: · 1 Daikon Radish · 1 cooked chicken breast or ½ cup shredded chicken · ½ cucumber · 1 mango · ½ red onion · ¼ cup coriander · ½ avocado · 1 lime Ingredients for Sauce: · 1 ½ tbsp. peanut butter (or cashew butter if paleo) · 1 tbsp. sesame oil · 1 tsp. tamari (or soy sauce) · 3 tbsp. orange juice · 2 tsp. lime juice Instructions: 1. Wash and scrub the Daikon Radish thoroughly to remove as much dirt as possible. Peel the outer skin off using a vegetable peeler. 2. Using a cheese slicer, cut thin strips running all the way down the length of the radish. Try not to push down too hard when peeling to keep the slices as thin as possible. Once you get close to the center of the Daikon it may become harder to slice as the flesh will have more holes, so flip the radish over and continue slicing on the other side. Depending on the length of the Daikon, each strip will make 2 rolls. 3. Prepare your filling. Shred the chicken and sprinkle it with the juice of 1 lime. Finally, dice the peanuts and cut the mango, avocado and cucumber into thin strips. 4. To assemble, lay out 1 strip of the radish and top with a few pieces of each filling. Top with coriander and then roll, ensuring you press down and keep the rolls tight. Repeat with the remaining rolls. 5. To make the sauce, place all of the ingredients listed above in a hand blender and pulse until well combined. You may want to add more orange juice depending on desired consistency. This sauce can be made up to 2 days ahead and stored in a sealed container in the fridge. 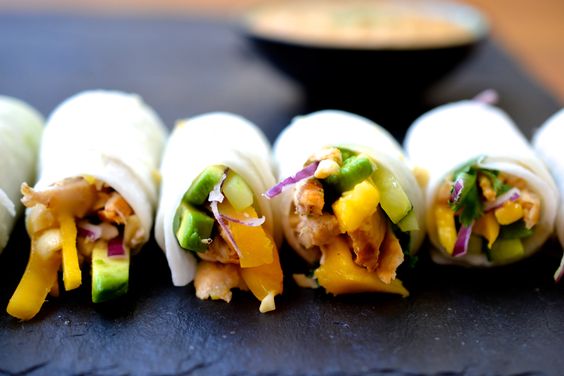 |